In this article we are going to share with you everything you need to know about the fascinating world of 3D character modeling. If you’ve ever wondered how those characters from the video games, animated movies or commercials are created, you’ve come to the right place!
3D Character Modeling Fundamentals
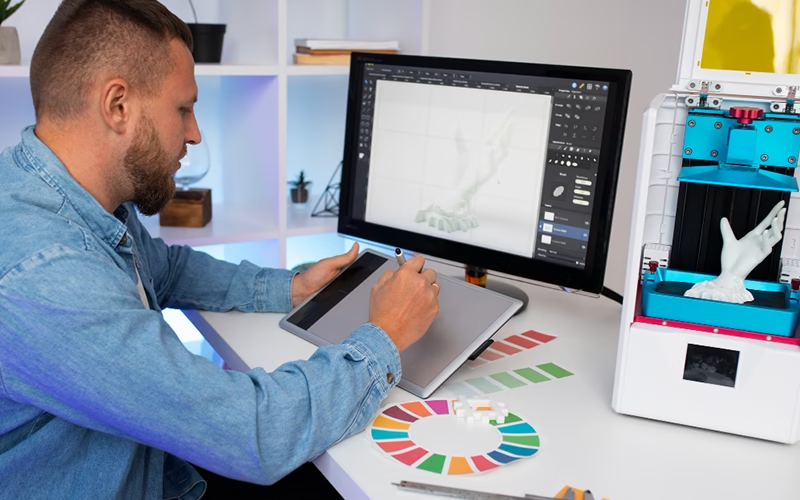
Let’s start with the basics. 3D character modeling is all about creating three-dimensional representations of humans, fantasy creatures or any other imaginable life form, within a digital space. Unlike other types of 3D modeling, character modeling focuses primarily on organic forms, which involves a unique set of challenges and techniques.
Before diving fully into modeling, I always spend time on concept design. This means creating sketches, gathering references and clearly defining what I want to achieve. This initial step saves a lot of time and frustration in the long run, believe me.
The main difference between modeling characters (organic forms) and objects (inorganic forms) lies in the fluidity and naturalness of the shapes. While a building has sharp angles and flat surfaces, a human body has smooth curves and complex transitions between muscles and tissues.
Popular software and tools
Currently, I have several favorite programs for modeling 3D characters:
Blender: My preferred choice for personal projects. It’s completely free and surprisingly powerful. Its a huge community and you’ll find tutorials for just about anything.
ZBrush: The industry standard for digital sculpting. It allows you to create incredibly fine details and work with millions of polygons seamlessly.
Maya: Widely used in professional studios. Offers a complete set of tools for the entire 3D production process.
Cinema 4D: Known for its friendlier learning curve, it is ideal for those who are just starting out.
If you are just starting out, I recommend starting with Blender. Not only is it free, but its latest versions have greatly improved the interface and usability.
Modeling process step by step
Now, let’s break down the process I follow when creating a 3D character:
1. Blocking or creating basic shapes.
I always start with extremely simple shapes. I think of my character as being made of blocks of clay or plasticine. At this stage, I concentrate on the general proportions and pose. I don’t worry about the details yet.
It’s as if I’m creating a basic mannequin: first I define the head, torso, limbs and establish the correct proportions between them.
2. Refining the mesh
Once satisfied with the general shape, I start refining the geometry. I add more divisions to the mesh to have more control over the shape. This is where I start defining more specific features: facial features, muscles, joints, etc.
I work from the general to the specific, and maintain symmetry when appropriate (later I may break it to add naturalness).
3. Digital sculpting
This is probably my favorite part. Using digital sculpting techniques, I mold the character as if I were working with virtual clay. With specialized brushes, I can push, pull, smooth and texture the surface.
At this stage, you can add wrinkles, creases, veins, pores and other details that bring the character to life. The key is not to overdo it: sometimes, less is more.
4. Retopology and optimization
Now comes the more technical part. Digital sculpting usually generates meshes with millions of polygons, too heavy to use in real time. The retopology consists of creating a new more efficient mesh that follows the shape of my detailed sculpture.
This new mesh will have a better polygon distribution (more density where details are needed, less in flat areas) and a clean topology that will work well for animation.
Texturing and materials
With the optimized mesh ready, I move on to texturing:
1. Creating UV maps
First I “unwrap” the 3D mesh to create a UV map, which is basically a 2D representation of my 3D model. Imagine you are unfolding the skin of an orange on a flat surface.
I try to create seams in strategic places where they won’t be very visible, and distribute the UV space efficiently.
2. Digital painting techniques
Now I can paint directly on the model or work on the UV maps in programs like Photoshop or Substance Painter. I create several maps:
Base color map: Defines the fundamental colors.
Normal map: Adds fine details without increasing the geometry.
Roughness map: Controls how rough or smooth each part is.
Displacement map: For deeper details if needed.
3. Applying materials and shaders
Finally, I create materials that combine all these maps. I can define properties like the translucency of the skin, the brightness of the eyes or the reflectivity of the metallic surfaces.
The shaders are small programs that determine how each material is rendered, and I adjust them to achieve exactly the look I am looking for.
Rigging and preparation for animation
If I want my character to come to life, I need to prepare it for animation:
1. Creating the skeleton
I insert a digital skeleton (armature) inside my character. This consists of connected bones that will follow the logical anatomy of the character.
2. Skinning
One of the most delicate steps is the “skinning” or vertex weighting. Here I define which parts of the mesh will be affected by each bone and to what extent. For example, when the elbow bone bends, I only want it to affect the part of the arm near the elbow, not the whole body.
3. Animation controls
To facilitate the animation, I create intuitive controls that simplify the process. These can be curves, shapes or any object that allows me to manipulate the character in a more natural way.
Tips for beginners
Throughout my experience, I have learned some valuable lessons:
Don’t skip learning anatomy: Knowing how muscles and bone structure work will help you tremendously, even for stylized characters.
Start with simple projects: A common mistake is to want to make an ultra-complex character as a first project. Better start with something more manageable.
Use references constantly: Even the most experienced professionals use references all the time.
Learn to take criticism: Sharing your work in online communities can give you valuable feedback.
Practice patience: 3D modeling takes time and dedication. Don’t get discouraged if your first attempts that don’t turn out as expected.
Current trends in 3D modeling
The field of 3D modeling is evolving rapidly. I am currently very excited about these trends:
Integration of AI into the creative process: Tools like Midjourney or DALL-E are changing the way we generate initial concepts.
3D scanning and photogrammetry: This is the ability to digitize real people and objects has advanced tremendously, enabling unprecedented levels of realism.
The metaverse and custom avatars: With the growing interest in virtual spaces, the demand for customizable 3D characters has exploded.
Stylization vs. hyperrealism: I see an interesting trend where both stylized style and photorealism coexist and influence each other.
Final thoughts
3D character modeling is a fascinating field that combines art, anatomy and technology. What I like most is that there is always something new to learn and techniques to perfect.
If you are thinking about getting into this world, I encourage you to download Blender today and start experimenting. Start with simple shapes, go at your own pace and, above all, enjoy the creative process.
Remember that every 3D artist you admire started exactly where you are now. The difference is made by constant practice and a passion for improvement.