Good landscape photography is more than just point and shoot, it is more of an art that combines creative vision, technique, but most of all patience.
Capturing the splendor of distant mountains, the tranquility of a lake or the dynamic dance of the waves can sometimes be a challenge as there are many unpredictable factors and with some basic principles, you can capture the beauty of nature at its fullest potential.
In the following lines I’m going to tell you some techniques and tips that you can apply in a simple way so you can improve your landscape photography. Let’s get started!
Essential Equipment and Basic Settings
Cameras: From Smartphones to Advanced Gear
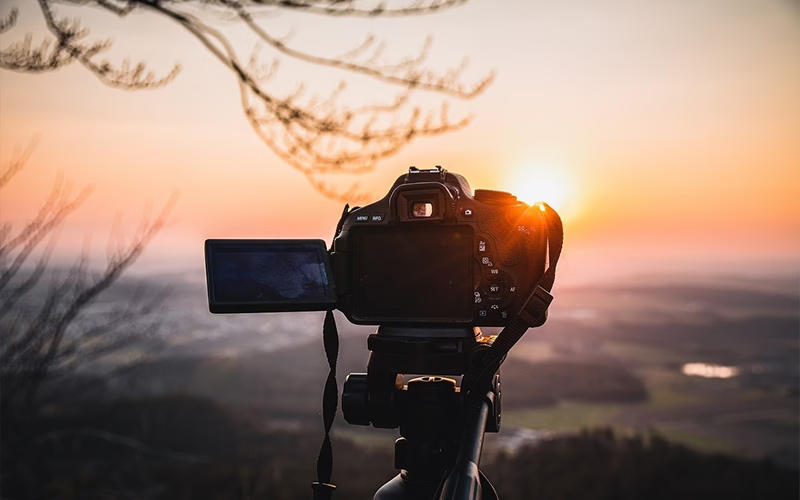
You don’t need to empty your bank account to start in landscape photography. Your modern smartphone can capture amazing images, although a DSLR or mirrorless camera will give you more creative control.
Lenses: Your Window to the Landscape
For lenses, a wide-angle (16-35mm) is your best ally: it captures broad views and exaggerates depth. A mid-range zoom (24-70mm) offers versatility for different compositions.
Accessories That Make a Difference
If you can invest in just one accessory, make it a solid tripod—it’s essential for sharp shots in low-light conditions. Filters will transform your images. A polarizer will reduce reflections and saturate colors, while neutral density (ND) filters will allow you to take long exposures even in broad daylight.
Basic Settings for Optimal Results
- Aperture: Use f/8 to f/13 for maximum sharpness and depth of field.
- ISO: Keep it low (100-200) to minimize digital noise.
- Shutter speed: Adjust it according to conditions, but remember that slow speeds (using a tripod) smooth out water and clouds.
A practical tip: always shoot in RAW format if possible—it will give you much more flexibility when editing later.
Composition: The Art of Framing the Scene
The Rule of Thirds in Action
Imagine your viewfinder divided into nine equal rectangles. Place important elements at the intersections or along these lines. This simple technique instantly transforms your landscapes, creating visual tension and balance. See that solitary tree? Try placing it at an intersection instead of the exact center.
Lines and Shapes That Guide the Eye
Natural lines—winding paths, coastlines, rivers, or even elongated clouds—are powerful tools. Use them to direct the viewer’s gaze toward your focal point. Curved lines create dynamism, while diagonals add drama and depth.
The Magic of the Foreground
A landscape without foreground elements often looks flat and uninteresting. Incorporate textured rocks, wildflowers, or fallen logs to create a sense of depth and scale. This simple addition connects the viewer to the scene, inviting them to “enter” your photograph.
Balance Between Sky and Land
The sky can be the protagonist or a complement. If it features dramatic colors or interesting clouds, give it more space in your frame (2/3). If the terrain is what stands out, reverse the proportion. Resist the temptation to divide the image exactly in half—it rarely works well in landscapes.
The power of simplicity
In photography many times “less is more”. So plan what you want to convey with the landscape you are going to photograph and eliminate any element that does not fit and can generate distraction from your real objective.
Mastering Light in Landscapes
The Power of the Magic Hours
The golden hours (just after sunrise and before sunset) transform ordinary landscapes into magical scenes. The warm, soft, and lateral light creates long shadows that reveal textures and shapes. The blue hour (moments before sunrise or after sunset) offers deep bluish tones perfect for silhouettes and reflections. Schedule your sessions around these moments for spectacular results.
Contrast and Exposure
Excessive contrast is one of the biggest challenges in landscapes. When the sky is bright but the terrain is dark, use graduated filters or multiple exposure techniques. Learn to expose for the highlights (preserving detail in the sky) and recover the shadows in editing. Alternatively, use exposure bracketing to combine multiple shots later.
Friend of “Bad” Conditions
Don’t be discouraged by “imperfect” weather. Dramatic clouds, distant storms, and morning fog add character and mood to your photographs. Often, the conditions that scare away other photographers are precisely the ones that produce the most memorable images. Always carry protection for your equipment and take advantage of these unique opportunities.
The Art of Long Exposures
Long exposures soften water, create silky effects on waterfalls, and transform moving clouds into ethereal brushstrokes. Place your camera on a tripod, use an ND filter to reduce incoming light, set a small aperture, and experiment with exposures of several seconds or even minutes. This effect adds a surreal and dreamlike element to your compositions.
Shadows as Compositional Elements
Don’t treat shadows as mere dark areas. Use them as compositional elements that add depth, direction, and drama. Long shadows in the morning or afternoon can create leading lines, natural frames, or fascinating geometric patterns. Observe how they interact with your scene and use them deliberately. Light is the most important element in landscape photography—learning to read it, wait for it, and master it is what differentiates a common shot from an unforgettable one.
Post-Processing to Enhance the Image
Basic Adjustments That Transform
Start with fundamental adjustments: exposure, contrast, highlights, and shadows. Small changes here have a big impact. Recover details in overexposed skies or overly dark shadows. Adjust the color temperature to reflect the atmosphere you felt: warmer for cozy scenes, cooler for melancholic or dramatic environments.
The Balance Between Reality and Expression
There is no rule about how much to edit. However, seek a balance between improving your image and maintaining its authenticity. Avoid oversaturation—that common mistake that betrays beginner photographers. Intensify colors selectively instead of applying excessive global adjustments. Remember that the goal is to enhance what you captured, not create something unrecognizable.
Advanced Techniques with Purpose
Zone processing allows you to treat different areas independently. Use masks to selectively adjust the sky, mountains, or foreground. Master curves for precise contrast control. Experiment with tone mapping to recover details in shadows and highlights without creating artificial results.
Accessible Software for All Levels
You don’t need expensive software to get started. Lightroom and Photoshop offer free trials, while Darktable, RawTherapee, or GIMP are powerful free alternatives. Mobile apps like Snapseed or Lightroom Mobile allow surprisingly advanced edits directly from your phone.
Organization and Efficient Workflow
Create a system to organize your files from the beginning. Tag your best images during the initial selection. Always save the original files and work on copies. Consider creating custom presets for your preferred style—you’ll save time and maintain consistency in your work. Editing is not “cheating”—it’s an integral part of the photographic process since the days of the darkroom. Used with discretion and subtlety, it elevates your images to the next level without compromising their integrity.
Conclusion
As I mentioned at the beginning of this article, landscape photography requires your unique and creative vision combined with a good technique and the patience necessary to take advantage of nature’s changes.
Now that you have the basic fundamentals and techniques you just have to go out and practice as much as you can, only then you will be perfecting and refining your landscape photography, once you have mastered the techniques dare to experiment to find that unique vision that distinguishes you from everyone else.
I hope these words have been to your liking, but more than anything useful. See you in a future post.