Motion photography is the art of capturing dynamic actions in a precise instant, freezing in a photograph moments that our eyes can barely appreciate.
Mastering this technique allows us to transform everyday moments into energetic images that tell a unique story. While it is true that we must overcome technical challenges such as light, speed and timing, with the tips I’ll share below you’ll be able to take moving pictures like a pro.
Essential Photo Editing Software
A good motion photograph doesn’t end when you press the shutter. Post-processing can transform a good shot into an extraordinary image. Here are the essential software tools to take your action photos to the next level.
Adobe Lightroom: Your Complete Digital Studio
Lightroom is excellent for editing motion pictures, as it allows us to quickly organize hundreds of shots, select the best ones and apply non-destructive adjustments to them. The developing tools will help us to bring out the dynamism of the photos by applying clarity, contrast and sharpness adjustments to bring the motion to life.
The selective adjustment feature is particularly useful: you can highlight the subject in motion while softening the background, directing attention exactly where you want it.
Adobe Photoshop: For Advanced Editing
When you need more precise control, Photoshop comes into play. It’s ideal for removing distracting elements, creating motion compositions, or applying creative effects like trails or duplicates.
Adjustment layers and masks allow you to modify only specific parts of the image, perfect for working with moving subjects against complex backgrounds.
Capture One: The Professional Alternative
If you’re looking for exceptional color reproduction, Capture One offers notable advantages. Its focus and noise reduction tools are especially powerful for action photography, where you often work with high ISOs or in low-light conditions.
Affinity Photo: Power at an Affordable Price
Not all powerful software has to be expensive. Affinity Photo offers similar capabilities to Photoshop for a fraction of the price, with a one-time payment (no subscriptions). It includes all the essential tools for editing motion photographs with professional results.
DxO PhotoLab: The Correction Specialist
PhotoLab stands out for its PRIME noise reduction technology, perfect for those situations where you’ve had to increase the ISO to freeze the action. It also automatically corrects lens distortions, a common problem when photographing motion with telephoto lenses.
Free Programs: Options to Get Started
If you’re just starting out, try GIMP or RawTherapee. Although their interface may seem less intuitive, they offer many of the functionalities of paid programs. They are excellent for learning the fundamentals of photo editing without investing money.
Recommended Equipment
Although a good photographer can capture motion with almost any camera, certain equipment greatly facilitates this task. Let’s see what tools will help you achieve those impactful dynamic shots.
Cameras for Capturing Action
Cameras with high continuous shooting speeds are your perfect allies. Models like the Canon EOS R6, Sony A9 II, or Nikon Z9 can shoot between 12 and 30 frames per second, drastically increasing your chances of capturing the decisive moment.
Look for cameras with a fast and accurate autofocus system, ideally with subject tracking. Eye or face detection technology is invaluable when photographing people or animals in action.
Buffer depth also matters: it’s your camera’s ability to continue shooting before “getting stuck” processing images. The larger it is, the longer you can maintain continuous shooting.
Versatile Lenses for Motion
A fast telephoto lens (f/2.8 or brighter) is almost essential for sports or wildlife. Options like a 70-200mm f/2.8 offer versatility and exceptional quality.
For indoor sports or wildlife, consider more powerful telephoto lenses like 100-400mm or even 155-600mm, which allow you to get closer to the action without interfering.
If you prefer urban or street photography, a 24-70mm f/2.8 or a 35mm f/1.8 will give you the versatility and brightness needed to capture spontaneous moments.
Accessories That Make a Difference
Having a good tripod with a fluid head is helpful for techniques such as panning or supporting heavy telephoto lenses.
If you require more mobility, a monopod would be ideal as it offers stability but you can also move quickly to follow the action you want to capture.
Don’t skimp on fast, high-capacity memory cards. Those classified as UHS-II are much faster for handling bursts of shots.
Extra batteries are essential: action photography consumes energy quickly, especially with continuous shooting.
Creative Techniques for Capturing Motion
Mastering different techniques will allow you to express motion in varied and creative ways. Each method conveys a distinct feeling, so experiment to find the one that best tells your visual story.
Freezing the Action
The most straightforward technique is to “freeze” motion using ultra-fast shutter speeds (1/500s or faster). This allows you to capture instants impossible to perceive with the naked eye:
- A water droplet upon impact with a surface.
- A jumper at the highest point of their trajectory.
- The flutter of a bird in mid-flight.
To achieve this, set your camera to shutter-priority mode (S or Tv), select a high speed, and let the camera adjust the aperture. On sunny days it’s easy, but in low light, you’ll need to increase the ISO or use a flash.
Panning
This technique conveys a sense of speed by keeping the subject in focus while the background appears blurred. Perfect for vehicles, cyclists, or runners:
- Use intermediate speeds (1/15s to 1/60s).
- Follow the subject with a fluid camera movement.
- Keep the shutter button pressed throughout the tracking.
- Continue the movement even after shooting.
The first few times, you’ll get many failed photos, but with practice, you’ll achieve images that convey speed while keeping the important elements sharp.
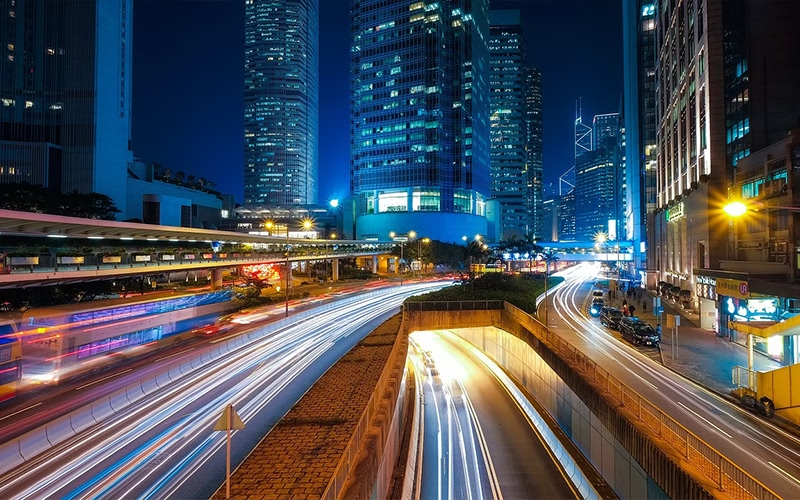
Long Exposures for Motion Trails
To capture complete trajectories, use long exposures (several seconds):
- Car lights on highways.
- Stars rotating in the night sky.
- Waterfalls with a silky effect.
You’ll need a stable tripod and slow speeds (1/15s or slower). Bulb mode allows you to keep the shutter open as long as you want. A neutral density (ND) filter is essential for using long exposures during the day, reducing the light entering the camera.
Multiple Exposure and Stroboscopic Effects
These advanced techniques show multiple phases of motion in a single image:
- Multiple exposure superimposes several photos of the same subject at different moments.
- The stroboscopic effect uses multiple flash bursts during a single exposure.
Many modern cameras include multiple exposure modes. For stroboscopic effects, you’ll need a flash with this function or manually trigger multiple flashes during a long exposure in a dark environment.
Intentional Camera Movement
Break the rules by deliberately moving the camera during the exposure to create abstract effects:
- Pan vertically when photographing trees.
- Zoom during the exposure.
- Rotate the camera while shooting.
Use speeds between 1/15s and 1 second for these experimental effects that convey energy and emotion in unexpected ways.
Each technique communicates motion differently. Don’t be afraid to experiment by combining them or creating your own variations. Motion photography is a fertile ground for creative experimentation.
Composition Considerations
Capturing motion goes beyond technique: effective composition turns a simple action photo into a memorable image. These compositional principles will help you structure your motion photographs with greater visual impact.
Rule of Thirds Applied to Motion
The classic rule of thirds takes on special relevance in action photography:
- Place your subject at one of the intersection points, not in the center of the image. This creates visual tension that enhances the dynamism of the movement.
- Leave more space in the direction the subject is moving. If a runner moves from left to right, place them in the left third, leaving “running space” in the frame. This technique, known as “directional negative space,” prevents your images from feeling uncomfortably restricted.
- For vertical movements (jumps, falls), apply the same logic but on the vertical axis, leaving space above or below depending on the direction.
Negative Space and Direction of Motion
Negative space is not an empty, purposeless area, but a powerful compositional element:
- Use clean areas to “breathe” around the intense action. This directs attention to the moving subject and avoids saturated compositions.
- Consider the direction of motion as an invisible arrow that guides the viewer’s gaze. A subject moving towards the edges of the image creates tension; one moving towards the center conveys resolution.
- Play with counter-intuitions: photographing a subject without space to move towards generates a feeling of restriction that can be impactful in certain narratives.
Framing and Point of View to Maximize Impact
The perspective from which you photograph radically transforms the feeling of motion:
- Shoot from low positions to exaggerate the feeling of height in jumps or acrobatics.
- Get close with a wide-angle lens for movements coming towards you, creating a dramatic sense of speed and proximity.
- Experiment with unusual frames: shots from above can reveal interesting movement patterns in groups of athletes or dancers.
- Incorporate environmental elements that frame the action: tree branches, architectural arches, or any element that directs the gaze towards the main subject.
Anticipating the Decisive Moment
Photographer Henri Cartier-Bresson coined the concept of the “decisive moment” – that perfect instant where all compositional elements align:
- Study the movement you’re trying to capture to predict its key moments. A jumper will have a peak point, a dancer will have culminating poses.
- Observe rhythmic patterns in repetitive movements (runners, cyclists) to anticipate when they will appear in the optimal position of your composition.
- Prepare your framing and settings beforehand, so you only have to worry about the exact moment of the shot.
- Patience is fundamental: sometimes you’ll need to wait long periods for all the compositional elements to align perfectly with the action you want to capture.
- Remember that these compositional rules are guides, not absolute restrictions. Know them well to be able to break them deliberately when your creative vision requires it. The best composition is the one that reinforces the story you’re trying to tell with your motion photography.
Post-Processing to Enhance Action Photographs
Digital development can transform a good action shot into an extraordinary image. Here’s how to enhance your motion photographs in the editing phase without falling into excesses that compromise their authenticity.
Basic Adjustments to Highlight Dynamism
The first steps in processing make a big difference:
- Slightly increase the contrast to give more punch to the action. Motion images often benefit from deep blacks and bright highlights that accentuate the dynamic feeling.
- Adjust clarity moderately (+15 to +30 in Lightroom). This control improves the micro-contrast of the edges, making the details in motion better appreciated without appearing artificial.
- Vibrance enhances colors naturally, especially useful in sports photography where colorful uniforms or equipment play an important role in the composition.
- Experiment with color temperature: warmer tones can convey energy and power, while cooler tones often reinforce the feeling of speed and technical precision.
Techniques to Correct Common Problems
Action photographs present specific challenges that you can solve in editing:
- Reduce digital noise that appears when using high ISOs (common in indoor or nighttime sports photography). Apply noise reduction while preserving details in the most important areas.
- Correct lens distortions, especially evident with telephoto or wide-angle lenses, which can alter the proportions of moving subjects.
- Adjust sharpness selectively: emphasize the main subject while maintaining a natural blur in backgrounds and secondary elements.
- For images taken with the panning technique, you can increase the background blur in post-processing to further emphasize the feeling of speed.
Balance Between Editing and Naturalness
Excessive processing can ruin the authenticity of a good action photograph:
- Avoid oversaturation of colors, especially in skin tones. Too intense editing can make athletes look artificial or unreal.
- Maintain smooth tonal gradation, especially in skies. Halos around subjects are clear signs of excessive processing.
- Consider the context: a sports photograph for the press requires more subtle editing than an artistic or advertising image where greater creative licenses are allowed.
Conclusion
Action photography invites you to tell dynamic stories. Every jump frozen in the air, every light trail, or every perfectly executed pan conveys emotions and narratives that static images cannot match.
The most valuable thing you can take away from this article is not the technical settings or editing tips, but the invitation to experiment. Try different speeds, angles, and techniques until you find your own style to interpret movement. Remember that constant practice is your best teacher.